Lesson 23: Game Resolution and Adaptation
Style is set — now solve something very "technical" and very deadly: whether pixel art blurs or cracks once it's in-game.
Looking good in Aseprite doesn't guarantee looking good on screen. The gap usually isn't "can you draw" but how resolution is set and how scaling is done.
1. Who Resolution Is For
Remember this (counterintuitive but practical):
Pixel art resolution is first the artist's drawing canvas; what players see is usually that canvas scaled up by integer multiples.
Common beginner trap:
- "The game is 1080p, so I'll draw pixel art at 1920×1080."
→ Too many dots, feels like illustration; scales blurry; pixel feel gone.
More reasonable approach:
- Set base resolution first: how wide and tall is the game world "natively"
- Player screen is display resolution
- Use integer multiples to scale base resolution as close as possible to display resolution
| Common Base Resolution | Aspect | Character Height (approx.) | Good For |
|---|---|---|---|
| 320 × 180 | 16:9 | ~16–24 px | Beginners, minimal, strong pixel feel (Celeste tier) |
| 320 × 240 | 4:3 | ~16–24 px | Retro handheld / SNES vibe |
| 640 × 360 | 16:9 | ~32–64 px | More common for modern Steam pixel games |
| 960 × 540 | 16:9 | Larger | Finer, but cost rises noticeably |
Beginner priority: 320×180. It scales ×6 → 1920×1080 and fits the 16×16 / 24×24 characters you've practiced.
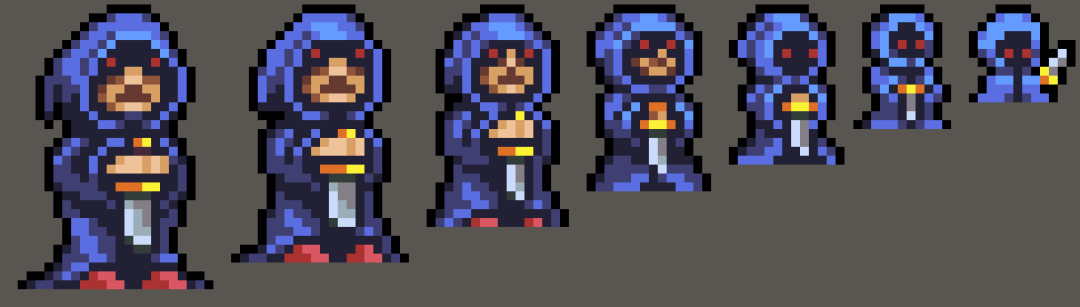
Character / emoji sizes follow the same logic: 24, 64, 112 aren't "bigger = better" — they're an information budget. Bigger means more pixels to manage.
2. Integer Scaling: First Rule of Pixel Perfect
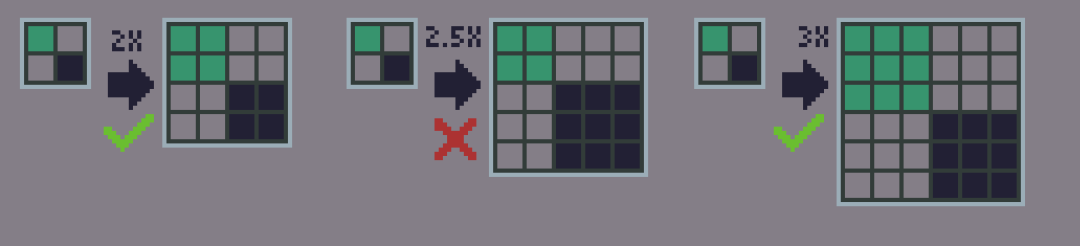
Scaling can be "lossless" — but only use 2×, 3×, 4×…
- 2×, 3×: each game pixel becomes equal-sized blocks → clean
- Non-integer like 2.5×: some pixels 2 cells, some 3 → edges break, looks dirty
Example (base 320×180):
| Display Target | Integer Scale | Actual Picture | Black Bars? |
|---|---|---|---|
| 1920×1080 | ×6 | 1920×1080 | No |
| 1280×720 | ×4 | 1280×720 | No |
| 1366×768 | ×4 | 1280×720 | Yes (centered letterbox) |
| 3840×2160 | ×12 | 3840×2160 | No |
Pixel perfect in plain terms: every game pixel on screen is the same-sized little square, no stretch distortion, no blurry edges.
Pixel game recommendations:
- Fixed base resolution
- Integer scaling
- If it doesn't fill the screen, use black bars (Letterbox / Pillarbox) — bars can get a simple frame, but don't trade "blur to fill" for looks
Widescreen extended view can come later; don't rush it at the start or art breaks at the edges and important objects fall off-screen.
3. Filters: Nearest for Pixel, Linear Destroys Pixels
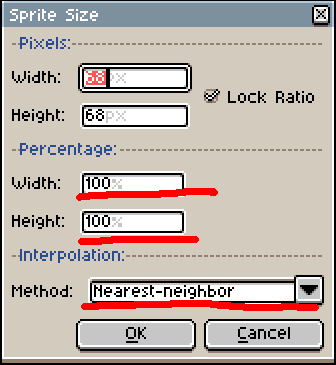
Same 3× scale:
- Point / Nearest Neighbor / None: hard edges, grid stays → use this
- Linear / Bilinear / Bicubic: colors smeared → instant blur
Software names vary — match the meaning: nearest neighbor, no smooth interpolation.
Same in engines / tools:
- Godot: fixed viewport window, Stretch often
viewport+keep(or integer scale plugins/settings) - Unity: 2D Pixel Perfect camera package; Import disable filter, use Point
- Exporting atlases / screenshots: check you didn't accidentally enable smooth scaling
Engine details come in later lessons; nail the "wrong filter" trap here.
4. Downscaling and "Already Scaled-Up Images"
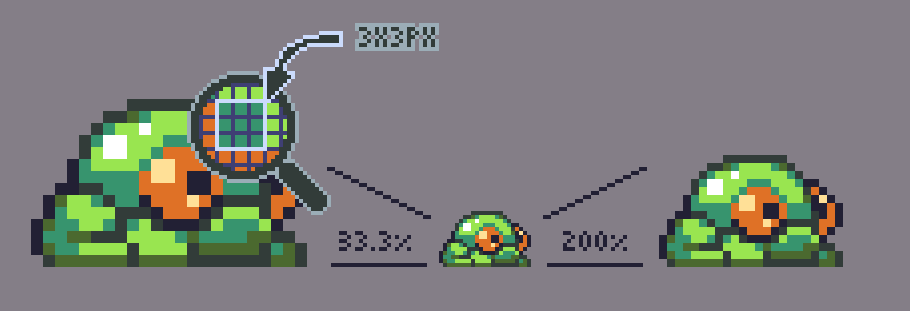
Three practical rules:
- Downscaling pixel art usually destroys hard edges — avoid when possible; if you must, treat it as "redraw a smaller version," not squeeze.
- Images others send are often 3× enlarged. For 2×: count how many screen cells one "big pixel" occupies → shrink to 1× → scale up by integer again.
- Non-integer scale looks broken; integer scale with wrong filter looks blurry — neither means "your drawing suddenly got worse."
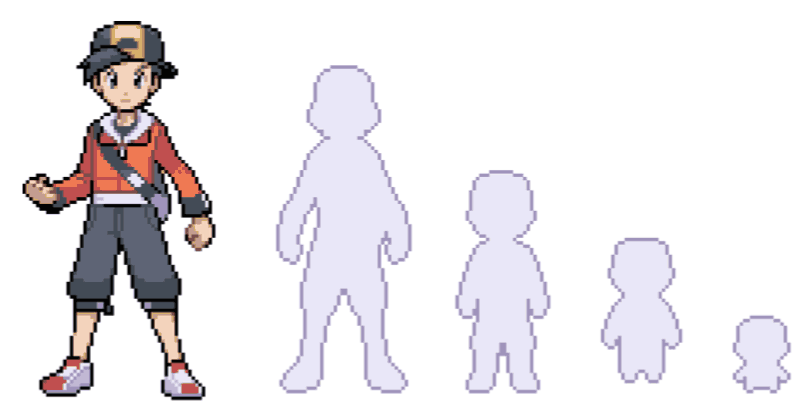
Same face from high resolution down to tiny icon: actively delete detail, actively keep recognition points. That's what artists do when "changing resolution" — not one click and done.
5. Aspect Ratio and Safe Area (Enough to Know)
Common ratios: 4:3, 16:9, 16:10, 21:9, mobile portrait 9:16.
Pixel game start: lock one ratio (usually 16:9) + black bars — most stable.
Leave a safe area:
- Health bars, buttons, dialogue text: don't hug the outer screen edge
- Mobile: notch / rounded corners / gesture bar
- TV: possible overscan — be more conservative at edges
Important interactables stay center-inward; edges are for decoration and distant scenery.
6. Quick Reference Table
| Your Situation | Recommendation |
|---|---|
| First complete pixel mini-game | 320×180, character ~16–24 tall |
| Steam-oriented, more emoji/UI | 640×360, character ~32–64 tall |
| "Must fill any window" | Not yet; pixel feel sacrifices first |
| Assets done but resolution wrong | Re-set base resolution rather than smooth-stretch to fit |
Once chosen, write one line in project README / Style Guide: Base = ?, Scale = Integer + Nearest.
7. Homework
- Pick base resolution: write game type + target platform + your width×height and reason (within three sentences).
- Make a scale table: for your base resolution at 1920×1080, 1366×768, 2560×1440, 3840×2160 — max integer scale, resulting picture size, black bars or not, approximate bar size.
- Comparison screenshot (engine or Aseprite export):
- A: integer scale + Nearest
- B: deliberately non-integer, or deliberately Linear
Side by side, label "where it broke / where it blurred."
Optional: on your mock layout, circle the 90% safe area and mark where health bar and main buttons should sit.
Next lesson: character design — silhouette, palette, layering. Resolution handles "how big the canvas is"; character design handles "what the person looks like."
课程作者:像素熊老师
微信公众号「教你画像素画」 · B站 · X / Twitter · GitHub