Lesson 25: Game Environments and Backgrounds
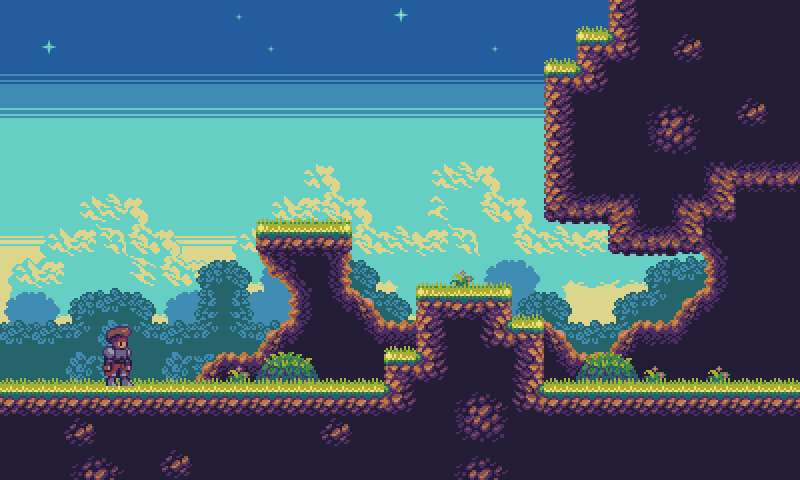
Character is done — it still needs a world to stand, run, and hide in. That's the environment.
Good environments aren't just "pretty": they help players find paths, danger, and goals, and lift the character (connects to Lesson 21 contrast and Lesson 24 silhouette palette).
1. Layer First: Scenes Are Stacked
Side-scroller environments commonly split like this:
| Layer | What It Is | Scroll Speed (approx.) | Job |
|---|---|---|---|
| Foreground | Grass tips, pillar edges, railings | Fastest | Add depth; don't block controls |
| Game Layer | Ground, platforms, enemies, items | 1× (follows camera) | The playable layer |
| Midground | Trees, buildings, large rocks | Slower | Create space |
| Background | Distant tree lines, ridgelines | Even slower | Mood |
| Far Background | Sky, clouds, sun/moon | Very slow or static | Atmosphere |
Like looking out a car window: near things fly by, far things creep, sky barely moves — layering in games does this; it's called Parallax, faking depth for the eye.
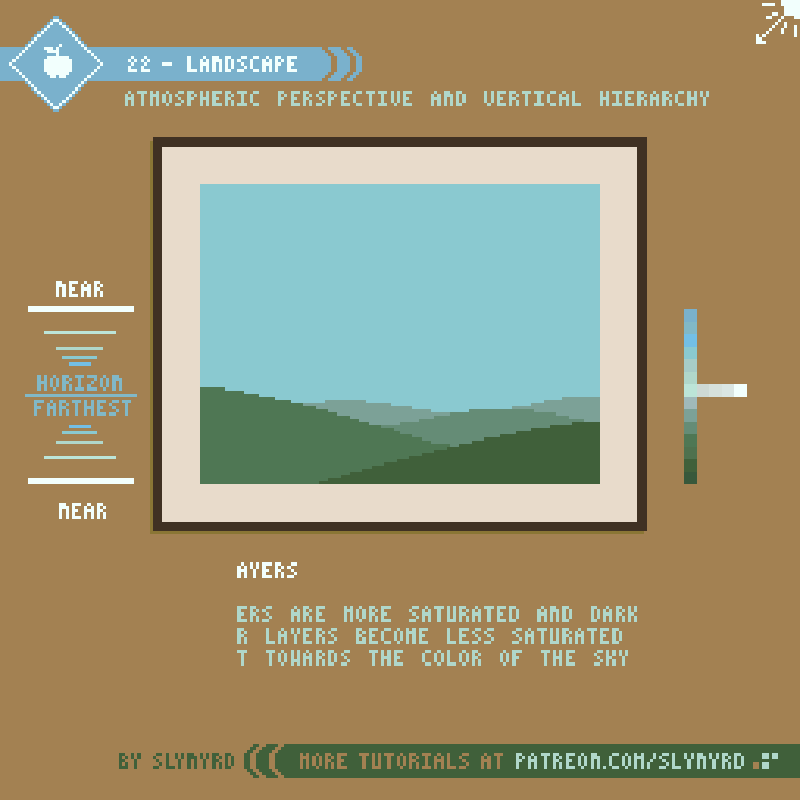
Atmospheric perspective is cheap depth too: near colors deeper and more saturated; farther = lighter, closer to sky color. No real vanishing point needed — push value steps.
2. Parallax: Multiply Each Layer by a Factor
Plain-language formula:
Layer offset ≈ camera offset × factor
Game layer ×1.0
Midground   ×0.5
Background  ×0.3
Far bg      ×0.1
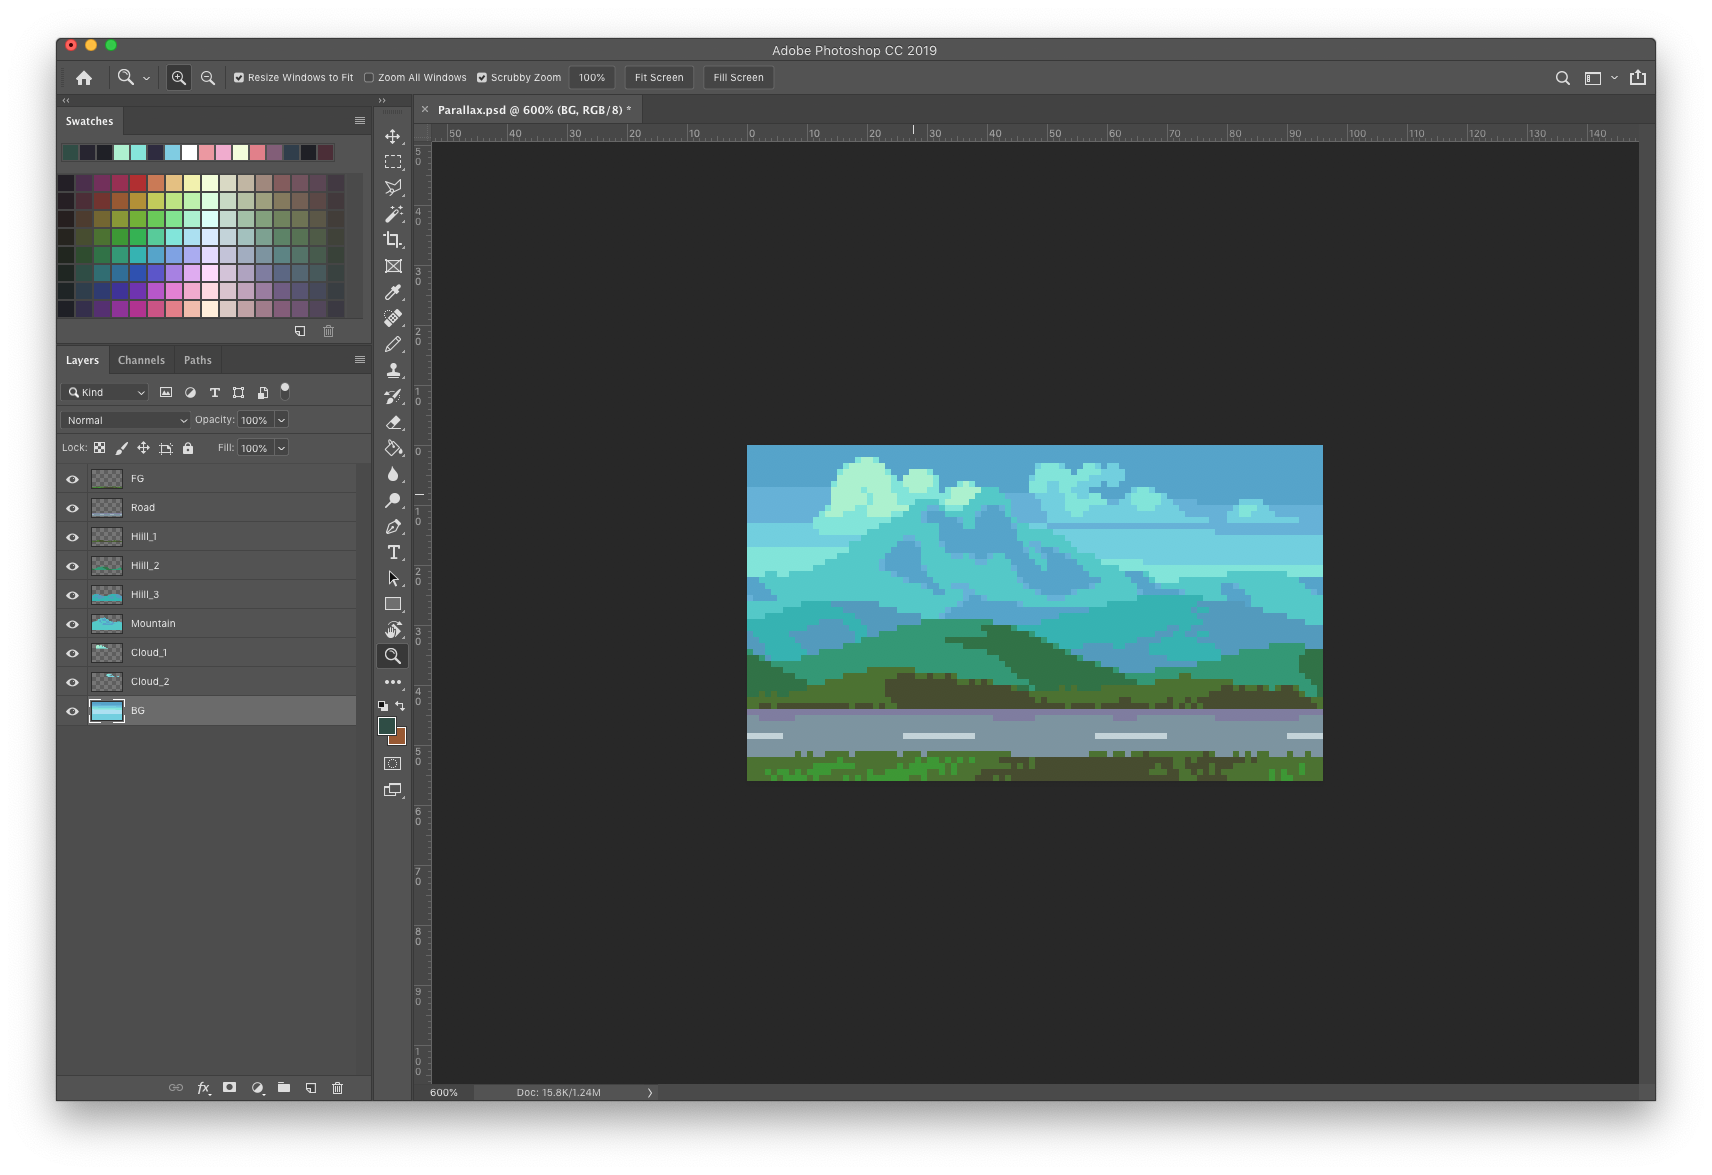
In art software, habit: far sky, mountains, hills, road, foreground each on their own layer, named clearly — in engine, just assign different scroll speeds.
For looping scroll:
- Left/right edges must tile (repeating grass, cloud bands tile better than "one lonely tower")
- Sun, unique buildings: don't sit on the seam
- Two images end-to-end; when camera reaches the duplicate's start, snap the original to the back — loop
Beginner start: clear game layer + 2–3 slow background layers is enough; don't open with five layers of VFX.
3. Composition: Where to Look, Where to Go
Three items are enough:
- Guide — path, slope, light, platform steps lead eye/feet toward goal
- Focus — door, chest, boss arena; brighter, more saturated, or glowing — but don't steal from protagonist
- Breathing room — sky, cave black, empty snow; rest the eye and let character silhouette stand
Self-test: drop your Lesson 24 32× character in — can you still spot yourself instantly? If not, reduce background contrast or change character primary color (don't blame "skill" first).
4. Tiles: Build Levels with Blocks
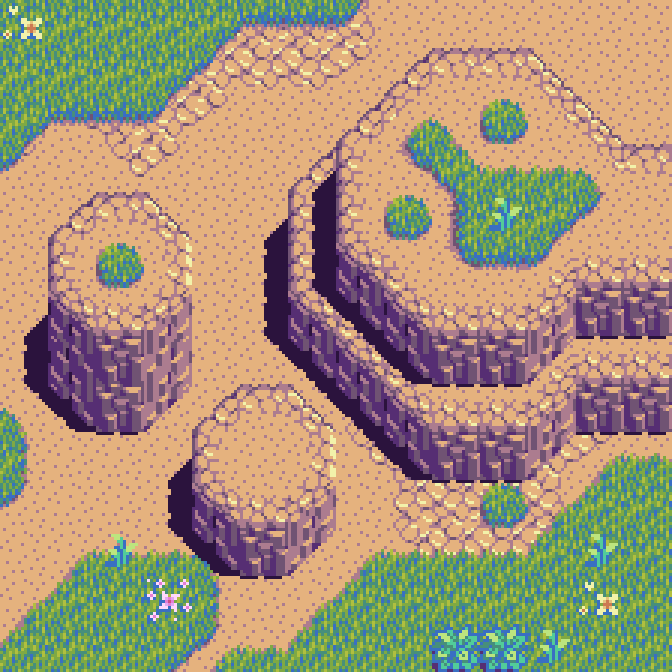
Tile = small repeatable ground block (common 8×8 / 16×16 / 32×32). Level designers tile them; no hand-painting whole worlds.
A tileset usually needs:
- Ground center (grass, dirt, stone)
- Four edges + four corners (or seams break)
- A few decoration variants (flowers, pebbles) to break repetition
- Functional blocks (platform edge, ladder, water) as needed
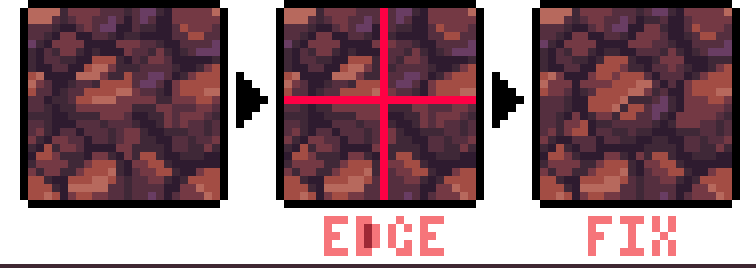
Seamless tiling trick: offset tile half — seam moves to center → paint out the crack → shift back. It passes when it tiles flat.
Engine Auto Tile / Terrain: pick edge/corner tile based on neighbors — provided your art set is complete.
Top-down and side-scrollers both use tiles; perspective rules differ. This lesson's side and top examples both apply — lock camera before homework (connects to Lesson 22).
5. Mood: Palette Tells the Story
| Feel | Primary Color Lean |
|---|---|
| Light exploration | Yellow-green + sky blue |
| Dangerous forest | Deep green + ink blue / purple |
| Hot cave | Orange-red + black |
| Ice/snow | Ice blue + white-gray |
| Ruined factory | Iron gray + rust brown |
Set one global tone first; local torch/window light as accents. Top light flat, side light dramatic, bottom light uneasy — pick one main direction and stick.
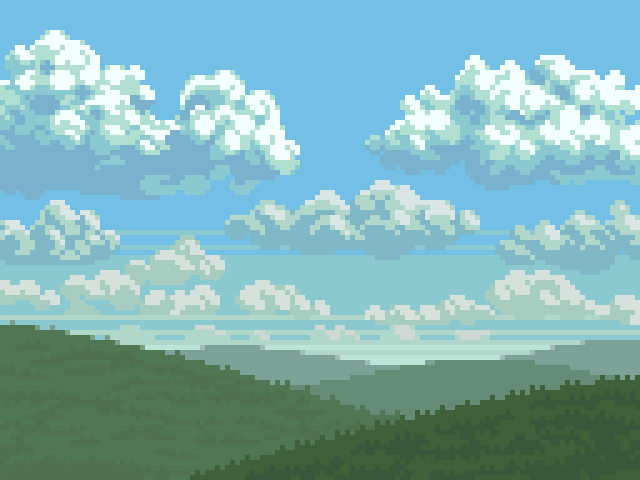
Mountain vistas can be very quiet: layers + sky color push distance; restrain detail — don't paint distant mountains as busy as near grass.
6. Suggested Draw Order (Side-Scroller)
- Color block plan: where path goes, platform rough placement, focal points
- Far background / sky (few colors, few details)
- Midground (still weaker than game layer)
- Game layer ground / platforms (readable, standable)
- Light foreground (semi-transparent or only corner occlusion)
- Drop in character, test contrast → adjust values
7. Homework
Make a at least 3-layer environment draft (use your base resolution, common 320×180 or 640×360):
- Three-line concept: location type + mood + reference (game or real world)
- Layer list: each layer — what to draw + suggested scroll factor
- Finished art: far / mid / game layers readable separately (composite overview OK; separate layer files better)
- Readability: place ~16–32 px tall character, screenshot proving "can find myself"
Optional: draw a 16×16 ground tileset (center + at least one edge/corner set), tile a 5×5 mini map and test seams.
Next lesson: items and props — potions, keys, coins in the scene: recognizable at a glance without stealing the show.
课程作者:像素熊老师
微信公众号「教你画像素画」 · B站 · X / Twitter · GitHub